
CFD post-processing with Blender
I always liked the combination of CFD results and photographs; so I decided it was about time I learned how to do them myself. And that’s where Blender comes in. The advantage of using Blender over photo editors like GIMP or Photoshop is the control over the 3D scene —camera, light, and geometry.
I just started this weekend with Blender and already managed to render a couple of nice pictures using data from the Shelby GT350R Mustang simulation.
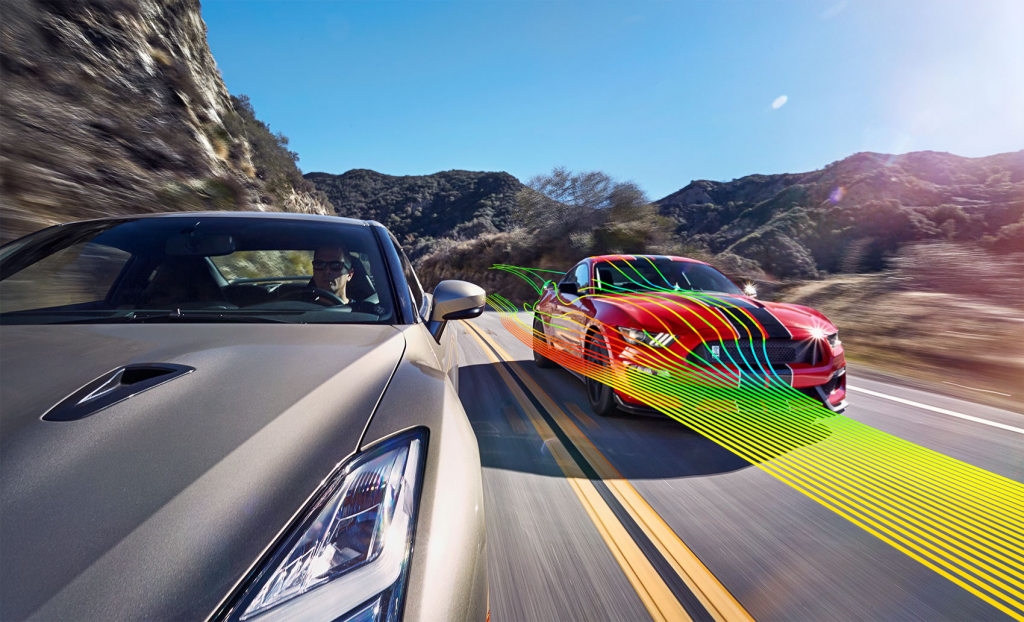
Streamlines in the way of the Shelby GT350R Mustang [background image source].
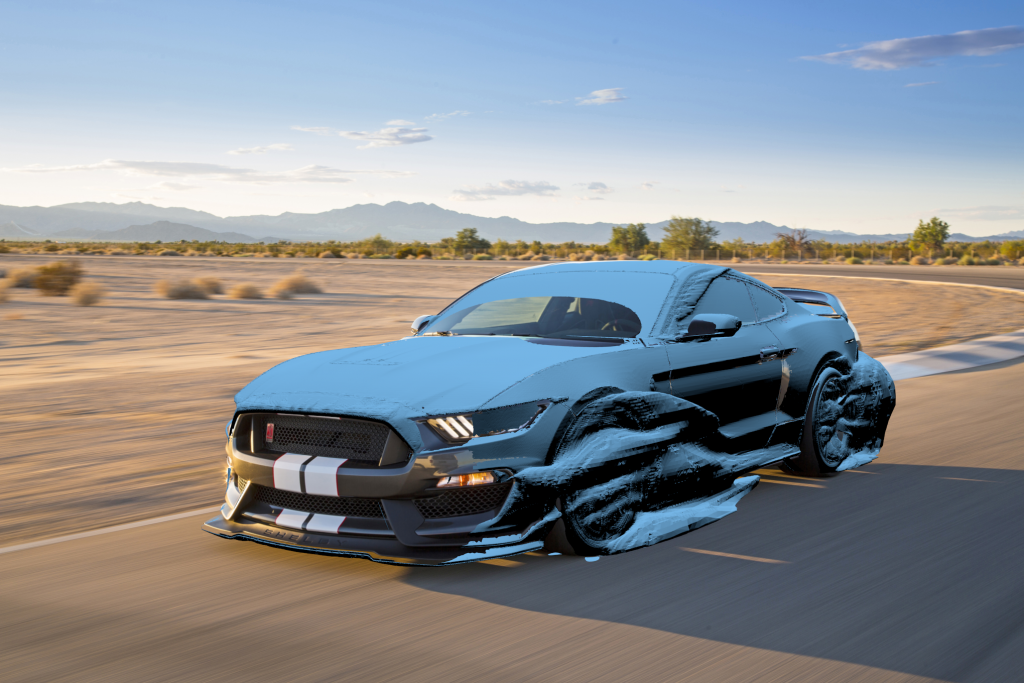
Total pressure isosurface around the Shelby GT350R Mustang [background image source].
Steps
All of this has been done with free, some, and open source software.
There are three main steps to accomplish the results shown above.
- Export the scene from ParaView in the X3D format and import that into Blender.
- Adjust the camera settings and position to sync the image with the geometry.
- To make this easier you can use the BLAM add-on for Blender.
- The add-on is also very useful to project the image into the geometry and by so doing hide the mesh of the car in the final rendered image.
- Render the scene.
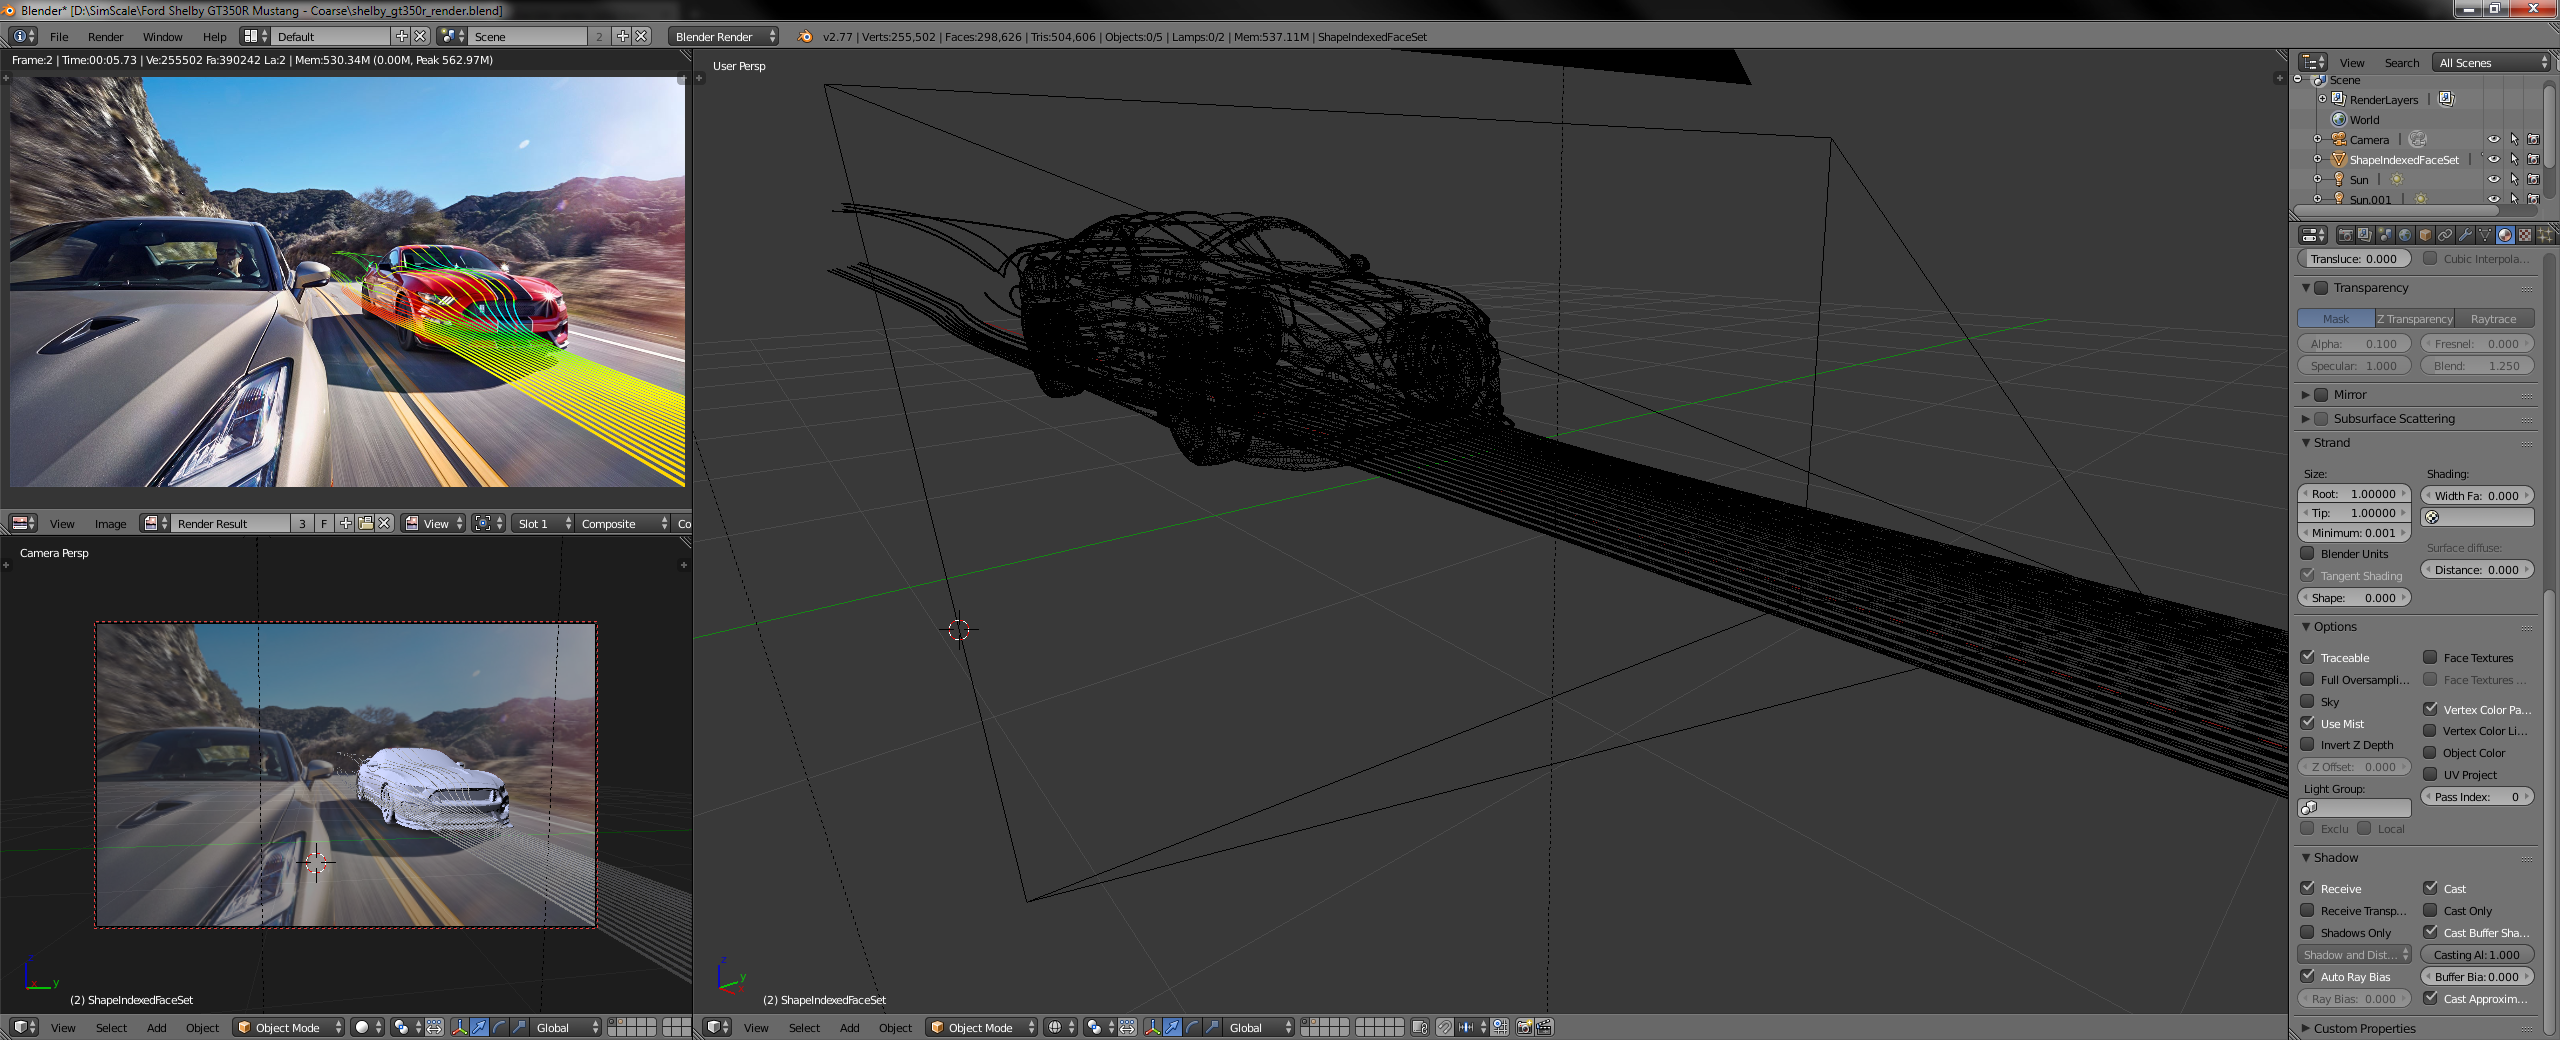
Blender GUI showing the three main stages of the process: 3D import, camera adjustment, and rendering.
Useful references
If you want to learn something more, I found the following videos quite useful:
And also the following links:
https://blender.stackexchange.com/a/19460/46879